It’s been a long time since I posted a craft tutorial and I’ve had a few friends ask me 1. What is a traveler’s notebook? and 2. How did I make my homemade one (called a Faux Dori because the original brand name of traveler’s notebooks is Midori). So I’m here with this post to share all the info I can with you about it 🙂
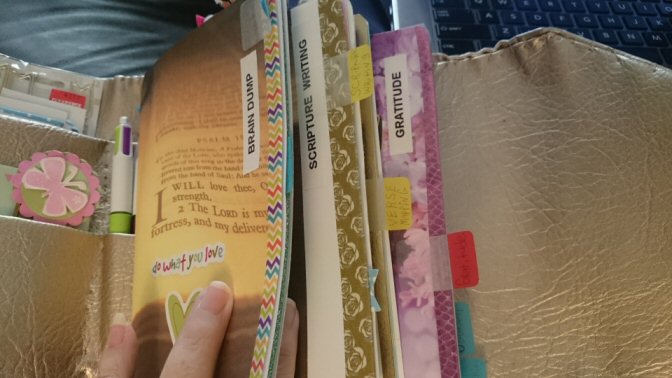
What is a traveler’s notebook? Think journal meets scrapbook meets planner 🙂 It’s really whatever you want it to be based on what inserts you use inside it. (Mine so far is more of a War Binder than anything). You can use it for a planner insert, a prayer journal, a scripture writing insert (which I’m using a lot), a bullet journal insert, junk journal insert, art journal insert, the sky is the limit. You can buy the inserts or make your own (which I do).
The original version is basically a piece of quality leather with elastic straps that hold inserts you purchase separately or make yourself.
This is one of my favorite videos that explains what it is, how to use it, and the overall idea behind it.:
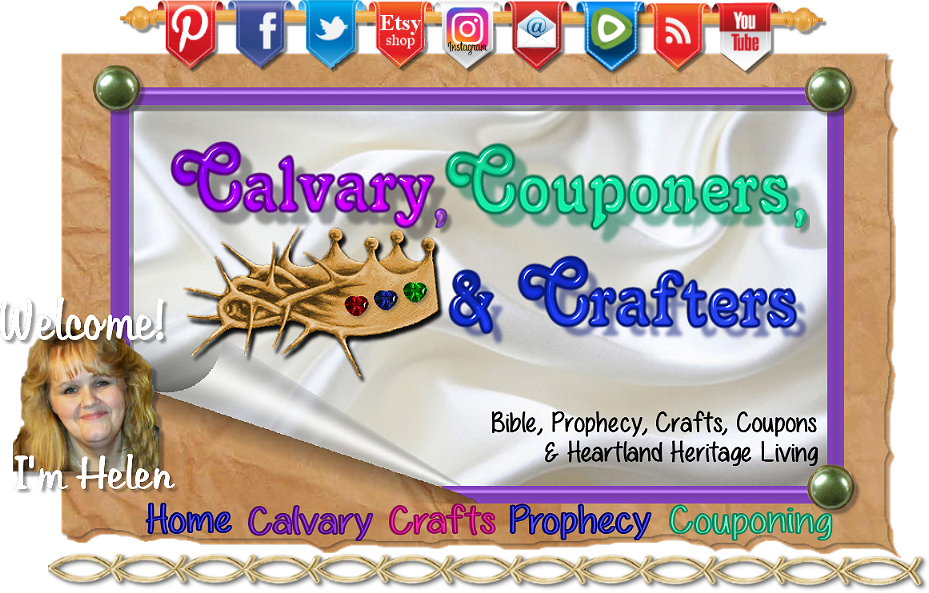
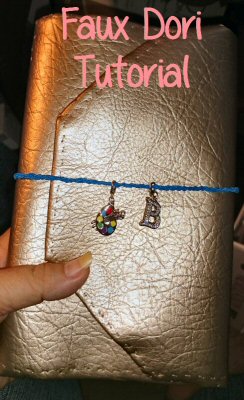
The name brand of the original traveler’s notebook is Midori. You CAN make your OWN traveler’s notebook and the inserts for it out of various supplies. That’s called a FAUXdori . I made one myself I’m using right now. I wanted to see if I really took to the idea of the traveler’s notebook before committing to a more expensive one.
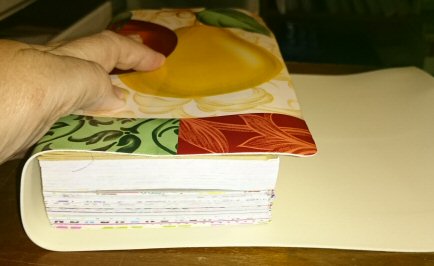
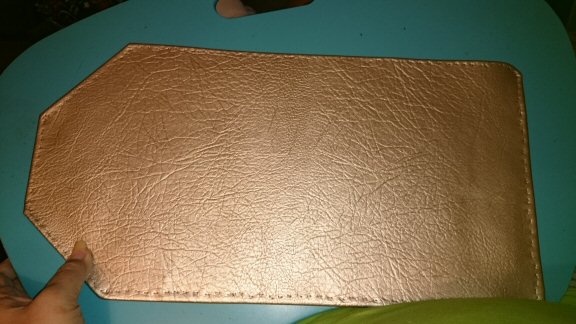
My Cover:
Ok, so it’s imperfect, but it’s really functional for me and I love it! It’s nothing super fancy ,but I used mostly materials I had on hand and it cost very little. I’ll share with you the link to the video that inspired it after these first few images then share the step by step pictures of how I did mine. After my tutorial, I will share my favorite videos of how other people have made their own awesome inserts.
I wanted mine to wrap around so that it protects the inserts inside it, so I just added some length to the original idea. I tapered the corners just for appearances sake:
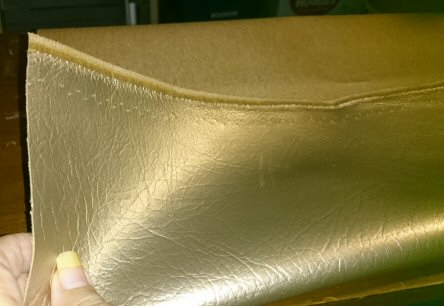
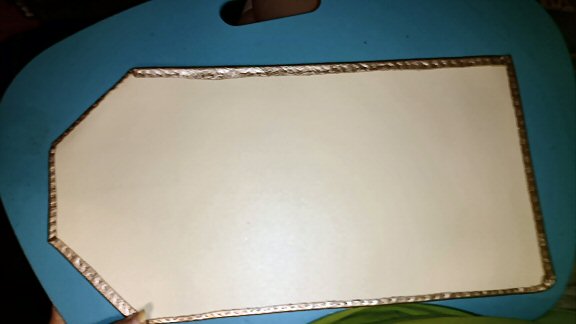
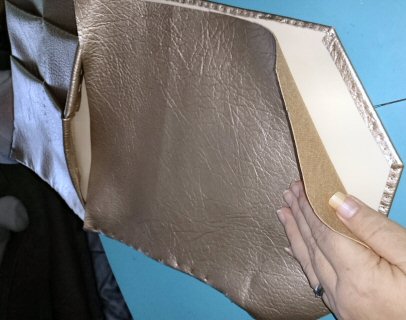
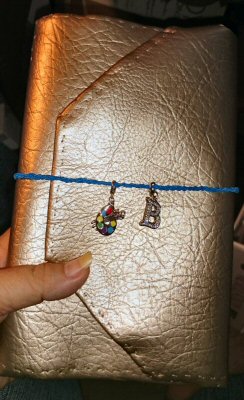 Inside: I really wanted some front pockets, so I just folded the gold material (I’m calling it pleather because I don’t remember if that was the exact name of it or not, but it’s a faux gold leather). I got it from the remnant section of the fabric store.
Here are a few good videos I learned from to create my own for very little money:
I used this idea to create the one I’m using right now. It’s with a place mat from the Dollar Tree! (a whole lot cheaper than leather!) There are a few differences I did in that I put a layer of gold pleather over the inside and outside and added some pockets with the pleather on the inside. Also I put my outside elastic on the spine, not the backside of it as I thought the button the elastic is attached with would be laying under the notebook itself and would affect my writing and mess it up. I also cut it big enough to make a flap fold-over to protect the inserts. But the start of it is from this video: https://youtu.be/twP6jHhLztA (and this one is like it: https://youtu.be/x4ZP_E0XLsk)
My Steps:
There are several different sizes of traveler’s notebooks. The newest size is called Cahier (not Cashier…leave the “s” out 🙂 ). It’s a regular-sized but extra wide. I wanted that so that I could add several inserts and still have my tabs covered (then I wound up adding the wrap around anyway).
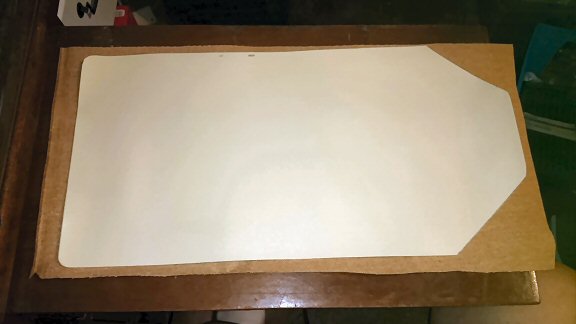
First I got one of those vinyl placemats at the Dollar tree. The inserts you see laying on it in the image below: I got from the clearance bin at Michaels. They are the cahier-sized and I wanted to buy the first ones so I could have a pattern to make my own (more about that later).
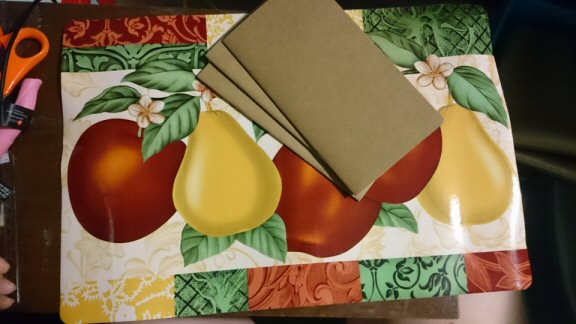
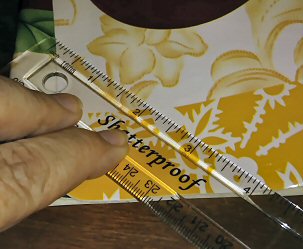
On the backside of the vinyl placemat, lay your inserts (making sure you have chosen the size of insert you want to continue using). If you don’t have an insert yet, know the size of the ones you want to use and measure according to that (you can decide that HERE). Add about half an inch to the top and half an inch to the bottom and draw a line where you’ll trim the placemat:
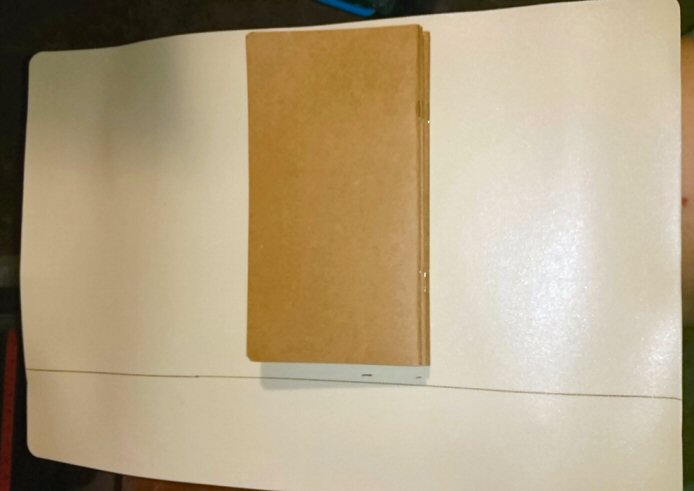
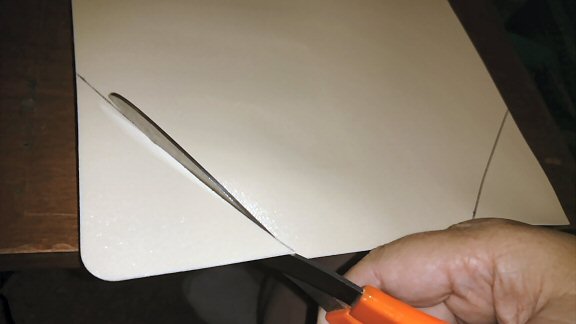
Cut along the line you drew

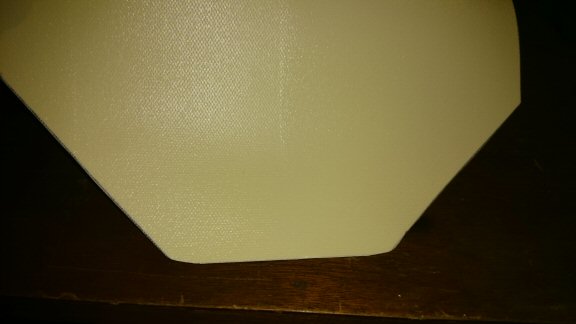
Then you have this and I think this is the point I decided to make it a wrap around as it was plenty wide enough to do so:

At this point I wanted to make sure I had the width I expected multiple inserts and add-ins to be, so this is how I figured that out. I just stacked some small pads of scrapbook paper with the few inserts I had gotten to decide on the width:
When I realized I had enough extra length to make it wrap around, I tapered both corners of one end by about four and a quarter inches:
 Then rounded the corners:
This is the gold fabric I used to cover it:
I used the placemat as a pattern to cut the gold fabric:
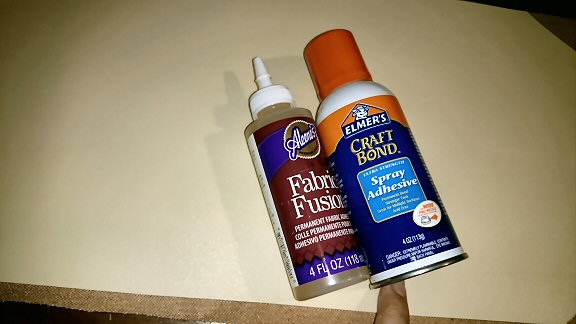
I wasn’t sure what would help it hold together the best, so I used two adhesives to glue the two together. Fabric Fusion and Spray Adhesive. It might have been overkill,but it’s stuck well 🙂
I would have used my sewing machine, but we had moved and my old sewing machine was still packed up and I got a new one that’s a combination embroidery machine and sewing machine and I wasn’t sure how it would handle sewing through the vinyl place mat, so I sewed the two layers together by hand. I did this all around the edges putting the wrong side of the gold fabric against the right side of the place mat, edge finishing it:

Make sure to notch the corners:
Finish sewing the two pieces together till you meet up where you began:
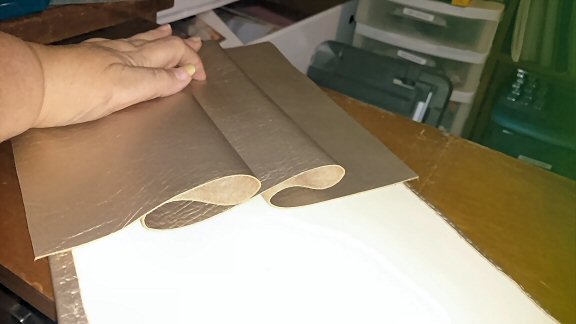
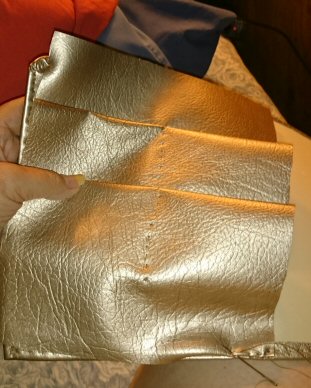
Now this next part looks tricky, but it really isn’t that big a deal. I just laid the gold fabric over top the wrong side of the sewn piece (the un-tapered side -I did it on the left side) and fold it into the number of pockets you want. Just make sure to leave some extra fabric on top and bottom to be able to sew it onto the already-sewn portion:
I put strips of washi tape over the folds to keep them together till I moved to the next step:
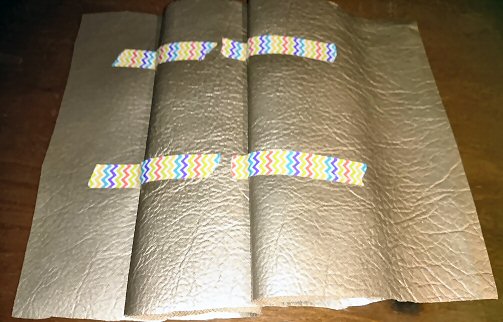
Lay the folded piece over the wrong side of the sewn piece. Trim it to where it’s about 1/3 the width of the place mat piece making sure the pockets are facing the right way up:
Next sew a line through the middle of the folded piece just to the top of the first pocket. Lay it over the bottom piece and fold the top piece just under at the edges and sew the two pieces together along the top, bottom, and left sides folding the edges of the folded piece over before sewing it to the bottom piece. Leave the right side open:
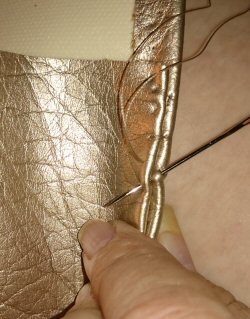
Edge finish the right side of the folded piece on the right side, but not to the bottom piece (actually you could have hemmed it before you sewed the folded piece to the bottom piece but I didn’t realize what I was wanting to do with it till I got to this point in taking the pictures as I went). So now you have the pocketed piece sewn onto the bottom along three edges:
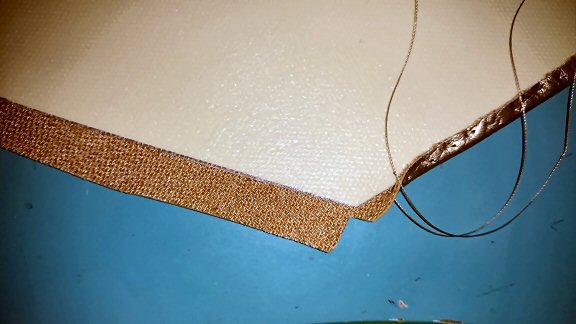
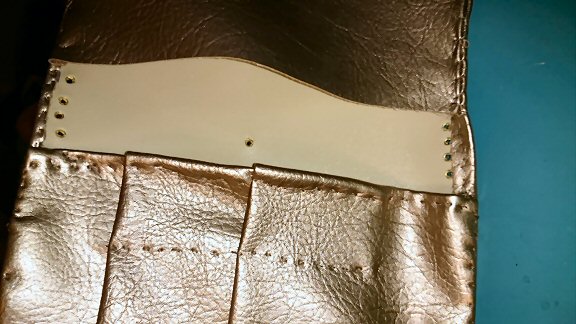
Take a third piece of the gold fabric and lay it over the top of the remaining wrong side of the place mat piece. Draw a line on the new piece (the wrong side -not in this picture) about half an inch beyond the edge of the sewn piece for a seam allowance:
**UPDATE: I just realized that I had gone back and cut 2 edges off the left side of the third piece (and removed the stitching at the edges at that area), so when you cut the edges to match the bottom piece, make sure you also leave two inches on the left side where you can see the white bottom of the place mat uncovered. (This is so holes can be punched to hold the elastic and the spine will fold easier). Look at the fourth image under this note where the ** is and it will make sense 🙂
Fold the upper, lower, and right side of the 3rd piece under (wrong edges together with right side facing outward) and sew them together Make sure you notch the corners like before and sew them together leaving the left edge open (like you did the last step with leaving the right edge open):

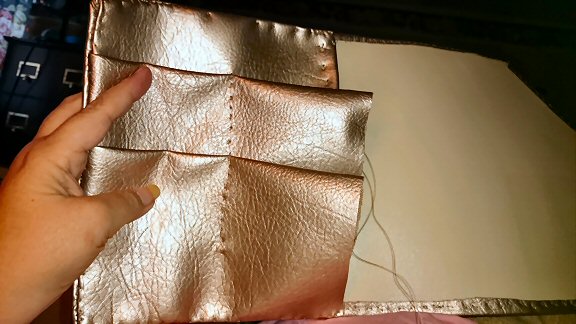
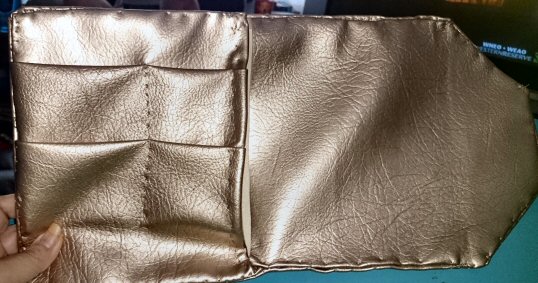
So now all your pieces are sewn together. I left the left edge of the un-folded piece open (not sewn down) so I could tuck a note or whatever inside should I want to and I thought it might fold easier with less tension there. There are no frays with this fabric anyway, so it’s all good. (The right edge of the folded piece is edge finished due to the pocket):
**
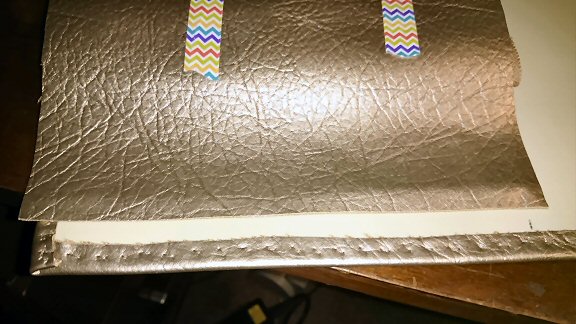
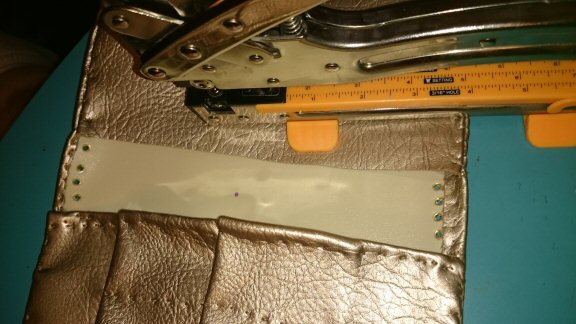
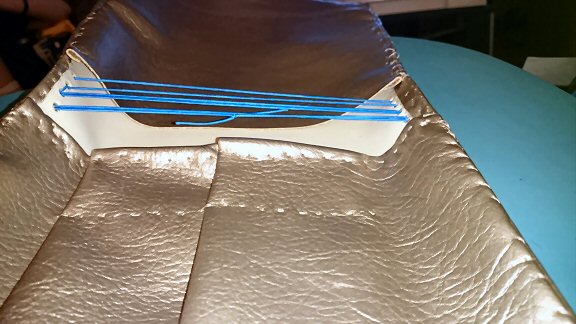
At this point you are ready to add your holes that will hold the elastic which will hold your inserts. I used my Cropodile to punch the little holes and added eyelets into the holes for better support to keep the elastic from pulling and tearing the cover, but that’s your call if you want to go that far or not. You can use an awl or a punch or something sharp to make the holes. I chose four holes because I wanted to have at least 8 inserts in my traveler’s notebook (using the Midori bands as in the video posted below to double my inserts). You punch four holes in the top and four in the bottom as in the picture below. Place them in the single layer area between the pocket side and the other. Just make sure it’s in the area where you want your spine to be. (The picture below makes better sense than my explanation 🙂 )
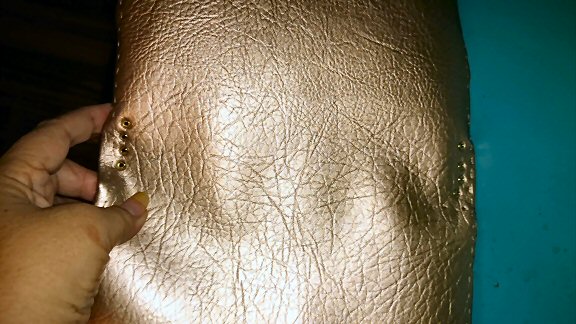
It looks like this on the other side:
Add another hole right in the middle of the spine halfway between the two sets of four holes. This will be for your outside elastic cord:
I forgot to add pictures along the way for how to add the elastic, but if you watch this video (same as above) it will show you. You want that little bit of pull that you see below like the edges are curled up. That means it’s taut and when you add your inserts, it will straighten the cover out, but hold your inserts securely. Go to 19:30 mark in this video to see how that’s done.
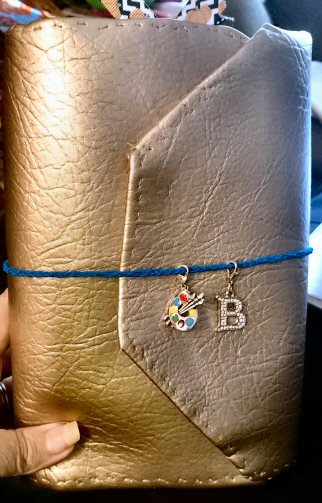
At the 24:25 mark, she will show you how to put the outer elastic on. She puts the hole in the middle of the back so the elastic comes out the hole in the back and wraps around the whole thing. However, I put mine in the middle of the spine so that when the notebook is laying down and I want to write in it, there’s no button bulging under it throwing my writing off. It won’t do that if put on the spine. Also, the elastic cord I had on hand in my craft supply is pretty thin which was perfect for the inside, but it was pretty flimsy on the outside. What I did was crochet a chain length of the elastic to triple it up and make it stronger. That’s a temporary fix till I can get a thicker cord of elastic to replace it 🙂 But it’s surprisingly holding up really well!
Here’s my finished traveler’s notebook/Fauxdori! I added the two charms because I couldn’t make up my mind between them, so I just put them both on 🙂
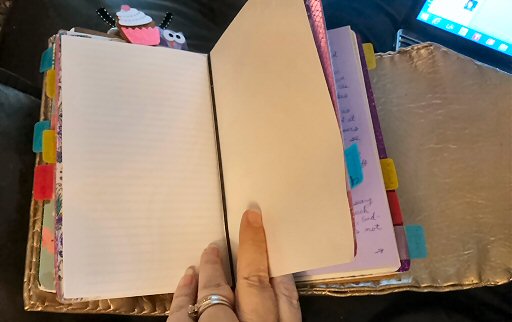
Inserts:
Ok, I make my own inserts (after the first set I got in the clearance bin at Michaels to use as a pattern), but I learned how to make those with a few videos on YouTube and the authors of those videos do a much better job at teaching you how to do that than I have room for here 🙂 So I’m embedding those at the bottom here. Again, you can find the size chart for the inserts HERE. I’ll be adding some insert printables freebies soon and in the meantime, just do a search on Pinterest and you can find some there 🙂
TheSassyClub explains the basics of how to make an insert with good, empty pages you can add what you want to by hand, stamps, etc. She uses waxed thread to hold the pages together, which I used on my first home-made inserts, but since then I bought a long-reach stapler which is SO much faster!
Inspired Blush shows us how to make inserts using the Word software if you want calendars, lined pages, grid pages, and dotted pages (and you can always change it over to what you want typed there) printable and ready to print –or edit and print:
The Reset Girl has a great video that shows how she decorates her inserts here (after she explains the 101 on the whole Midori thing as well):
Dori with Love shows us how to add up to NINE inserts on a single spine elastic here! (Which is why I want my cover to be extra wide, so it wraps around all those inserts! 🙂 ) :
I hope this long tutorial makes sense and that you find it useful:) Happy journaling!!


